Thursday, August 25, 2011

Gooey Chocolate Peanut Butter Bars

Mrs. Melanie Hancock introduced me to these delicious bars. I'm so glad she did! They were such a big hit and really easy. They pretty much taste like a gooey chewy reese's cup :) Here's what you'll need for the bars
Yellow cake mix, butter, vanilla, eggs, peanut butter, chocolate chips, sweetened condensed milk, pecans (optional), and peanut butter chips. Melt 1 stick of butter in a mixing bowl
Add in the cake mix, vanilla, eggs, and peanut butter
mix well
Press into the bottom of a 9x13 dish (reserving 1 1/2 cups for the top)
Now prepare the chocolate filling. Combine chocolate chips, condensed milk, and 2 Tbs. butter in a small pot
 Cook on medium-low, stirring constantly until all the chocolate chips are melted. Stir in vanilla and chopped pecans
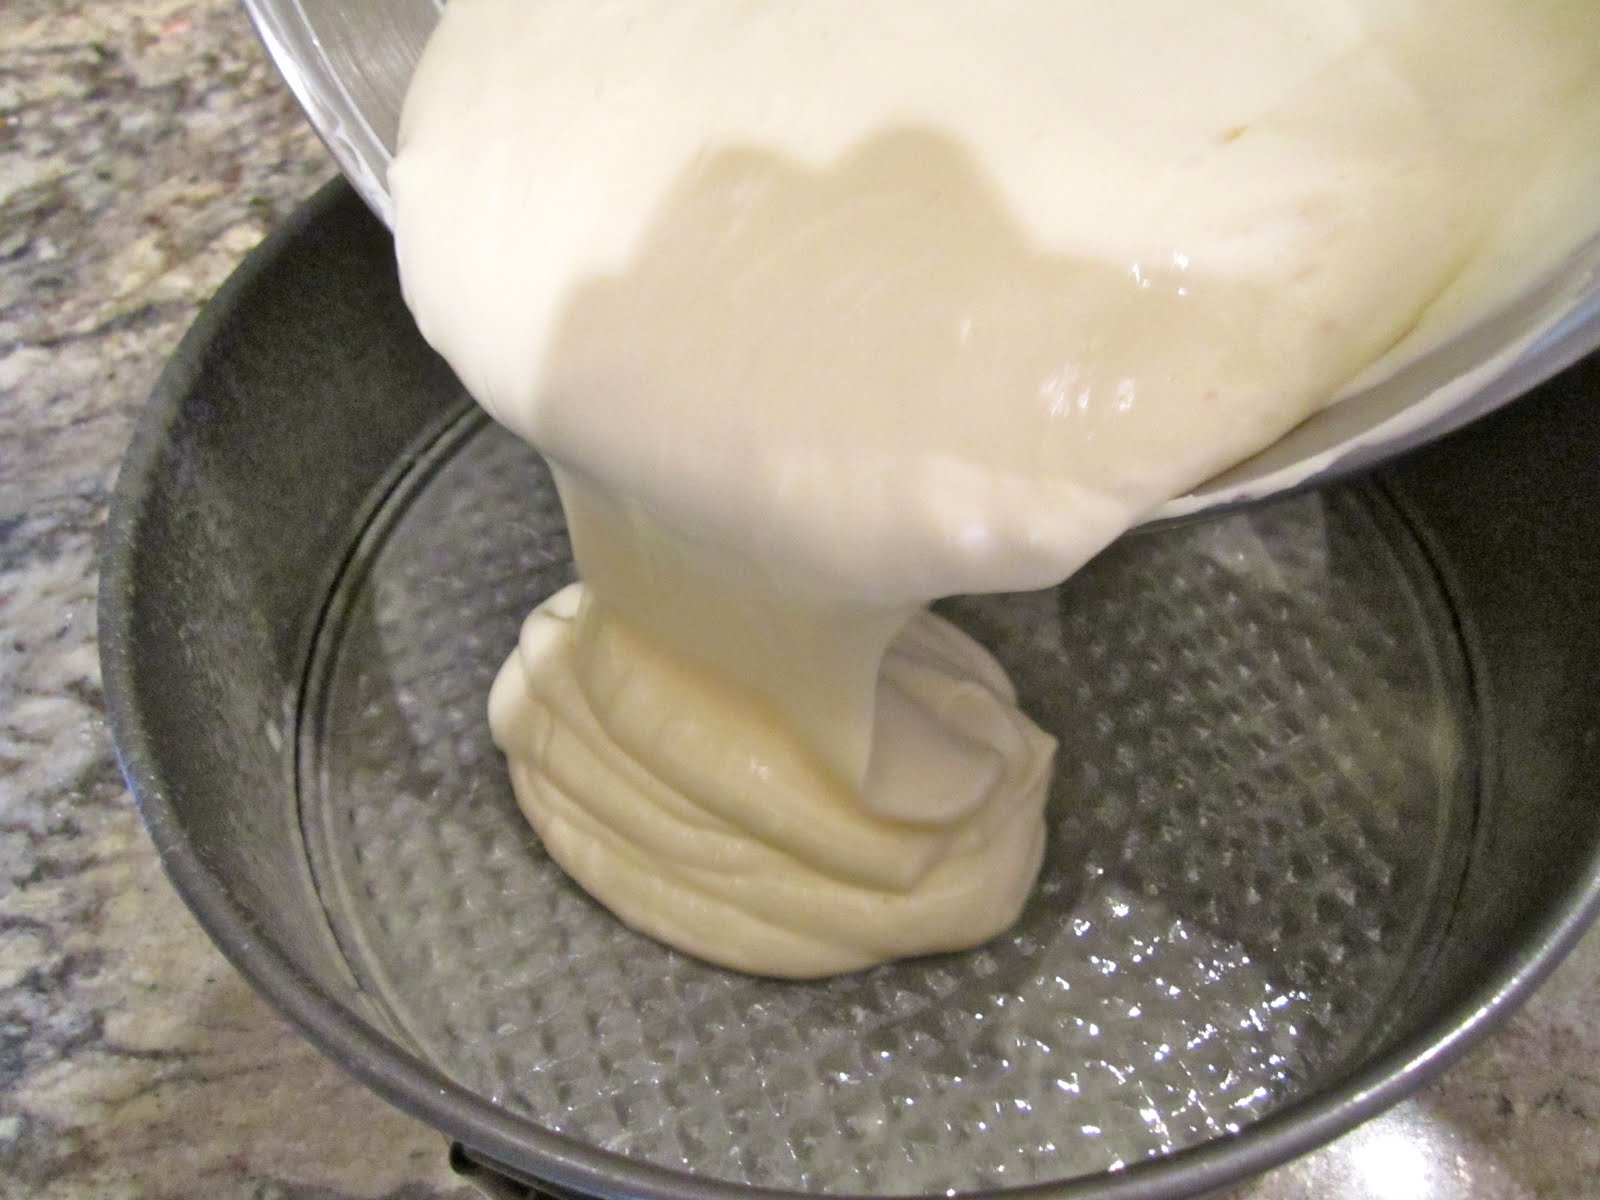
Pour over the uncooked peanut butter layer.
 Crumble the reserved 1 1/2 cups of peanut butter dough on top of the chocolate. Sprinkle a handful of peanut butter chips around the top
 Bake. Remove from oven and let the bars cool
 Let the bars set up at 3 hours before cutting into squares. Serve and enjoy :)
Store in an air-tight container up to about 4 days.

Chocolate Peanut Butter Bars

Combine:
1 pkg. plain yellow cake mix
1 stick melted butter
1 c. creamy peanut butter
2 eggs
1 tsp. vanilla

Press this into a 9X13 pan reserving 1 1/2 c. of the mixture to crumble on top.

Melt in pot:
1 (11.5- 12 oz) pkg. milk chocolate chips
1 can sweetened condensed milk
2 T. butter 

Remove from heat and add:
2 tsp. vanilla
1 c. coconut, chopped pecans, peanuts, walnuts (optional) (I used pecans and I barely noticed them)
Spread chocolate mixture over the mixture pressed in the pan and then crumble the 1 1/2 of reserved cake mixture on top. Sprinkle a handful of peanut butter chips around the top of that. Bake for 20-30 minutes at 325 degrees. Do not let these get brown and hard (I took mine out of the oven when they were just past the 'jiggly' stage in the middle.) They are way better a little under cooked than over cooked. Cool completely before cutting into bars. Store in an sir-tight container up to 4 days. 

Wednesday, August 17, 2011

6 Layer Cake :)

There are no words for this cake. The first time I had it was when Ellen Griffin brought over a huge slice of it to our house. I'm so thankful for that day.. not being dramatic, just honest. It's her mom (Cindy Griffins) recipe and she was nice enough to share it with us :) This is definitely sweet tooth sisters go-to cake. It is devoured every time we make it, no matter how many people contribute to stuffing their faces. I have a friend who doesn't like chocolate, but loves this cake. I also have a friend who doesn't like cake, but guess what.. she loves this cake. Credit for the best cake ever goes to Cindy Griffin. Thanks so much! We know we can't make it as good as hers, but we try our hardest! I am confident you will fall in love with this cake. Here's what you need for the Swiss Torte Cake (6 layer cake, Cindy Griffin cake, best cake ever, chocolate cool whip cake) any of the above will work
Chocolate cake mix, instant chocolate pudding, eggs, oil, vanilla, and buttermilk. Combine all ingredients into one large mixing bowl, easy as pie! Actually, easier than pie
Stir on low speed until combined. Turn up the speed to about medium and beat for 30 seconds, or until there are no/few lumps in the batter. Finished batter
Pour batter evenly into 3 well greased cake pans
Bake to perfection
Carefully flip out of pans right away onto a wax paper lined cooling rack. Let the cakes cool to room temperature. While cooling, prepare the cool whip frosting. Here's what you'll need for the most amazing frosting ever
Cream cheese, sugar, powdered sugar, vanilla, cool whip, and hershey candy bars. In a large mixing bowl, beat together cream cheese, vanilla, sugar, and powdered sugar
Beat until creamy. Fold in thawed cool whip and chopped hershey bars
Here's the finished frosting
Don't even bother trying to resist this stuff. Now assemble the cake. Cut the cooled cake layers in half to make 2 layers
Carefully pick up half of the cut layer and place it on the serving plate you're using. Slap some frosting on top
Spread it around evenly and lay the other half of the layer on. Repeat until all 6 layers have been stacked
Use the remaining frosting to cover the tops and outside of the cake
Now slice, and surprise :)
Here's the beautiful birthday girl with her cake
And if you want, some people like oreos on their cake..
I love this little booger. Keep cake refrigerated! Personally I like this cake better when it sits overnight, I think it's more moist the second day.

Swiss Chocolate Cake 
(Mrs. Cindy Griffin)

1 box chocolate cake mix (milk chocolate, devils food, swiss chocolate)- any will work
1 small box instant chocolate pudding
3 eggs
1 Tbs. vanilla
1 cup oil
1 1/2 cups buttermilk

Combine all ingredients in a large mixing bowl. Beat on low speed until combined, turn mixer up to medium speed and beat until there are no lumps in the batter. Pour into 3 8-inch round greased cake pans. Bake at 350 degrees for 20-30 minutes or until cakes are no longer jiggly in the middle. Remove from the oven and let sit about 2 minutes. Carefully flip cakes out onto wax/parchment paper lined cooling racks. Prepare the frosting while the cakes are cooling.

cool whip frosting:
8 oz. cream cheese, soft
1/2 cup sugar
1 cup powdered sugar
2 tsp. vanilla extract
16 oz. cool whip, soft
6 hershey bars, chopped

Beat together cream cheese, both sugars, and vanilla until smooth and creamy. Fold in cool whip and chopped hershey bars. Now it's time to assemble your cake. Cut the cooled cake layers in half to make 2 layers. Carefully pick up half of the cut layer and place it on the serving plate you're using. Slap some frosting on top. Spread it around evenly and lay the other half of the layer on. Repeat until all 6 layers have been stacked. Use the remaining frosting to cover the tops and outside of the cake. Refrigerate at least 2 hours before serving. I guarantee this cake will be a huge hit. Thanks again for the recipe, Cindy! 

Monday, August 15, 2011

Monster Cookies.. Best Cookie Ever.

I'm going to go ahead an apologize ahead of time because I am going through a major cookie/bar phase. So these next couple of posts are going to be all about cookies and cookie bars.. hopefully you love cookies as much as sweet tooth sisters do! These cookies are amazing and there's no other way to describe them. You start out with a peanut butter oatmeal cookie dough and pretty much make up your own monster cookie by adding whatever candies you desire. The possibilities are endless, so go crazy with it :) Here's what you need for monster cookies
sugar, brown sugar, vanilla, baking soda, salt, eggs, corn syrup, butter, peanut butter (I prefer a mix of crunchy and creamy, but do which ever you like best), flour, old-fashioned oats, and add ins: peanut butter chips, chocolate chips, mini m&ms. (Reese's cups, white chocolate chips, butterscotch chips, etc. would also be really good in monster cookies). In a large mixing bowl, combine eggs, both sugars, vanilla, salt, baking soda, and corn syrup
Mix well using a mixer or spatula. Once fully mixed, add peanut butter and melted butter
Beat those ingredients in. Then, stir in flour and oats
Lastly, fold in the (add-ins) chocolate chips, peanut butter chips, and m&m's
Dough will be a little runny from the melted butter
don't add more flour because you refrigerate the dough to set up. If you add more flour, your cookies will turn into bricks in the oven. After the dough has chilled a couple hours, scoop using a cookie scoop or 1/4 measuring cup (that's the proper measurement for monster cookies). Place dough balls on a parchment paper lined baking sheet. Gently press down on the dough to flatten a little because the cookies don't spread much
Bake
Cool on cookie sheet a couple minutes; carefully transfer onto foil or cooling rack
Store in an air-tight container up to 3 days. And as always, eat with a large and in charge glass of milk :)

Monster Cookies
3 eggs
1 cup sugar
1 cup brown sugar
1 Tbs. vanilla
1 tsp. salt
2 tsp. baking soda
1 tsp. corn syrup
3/4 cup creamy peanut butter
3/4 cup crunchy peanut butter
1 stick butter, melted
3/4 cup flour
4 1/2 cups oats
1 cup semi-sweet chocolate chips
1 cup peanut butter chips
1 cup mini m&m's

1. Preheat the oven to 350 degrees. Line a baking sheet with parchment paper.
2. In a large mixing bowl, stir together the eggs, both sugars, vanilla, corn syrup, baking soda and salt. Then stir in the melted butter and peanut butter, followed by the oats and flour. Lastly, stir in the chocolate chips, peanut butter chips and M&M’s (or any other add-ins of your choice). Chill the dough for at least 1-2 hour(s). (Dough will be slightly runny before chilling, do not add more flour. This will cause the cookies to become bricks).
3. Drop the dough by ¼ cupfuls (or smaller if you don't want huge cookies) onto baking sheets. Use your fingers to flatten the dough slightly. Baking for 8-12 minutes (depending on the size cookies you decide to make). Slide the parchment paper off the pan and let cool on counter. Store left-over cookies in an airtight container up to 3 days.

Tuesday, August 9, 2011

White Chocolate Macadamia Nut Cookies

cookies+white chocolate+macadamia nuts=perfection. They are sweet, salty, crunchy, and chewy. You basically start out with a regular dough that you would use for chocolate chip cookies. So if you want you can put more add-ins into the cookies, for example; coconut or dried fruit, etc. Here's what you need for regular white chocolate macadamia nut cookies
Butter, vegetable shortening, sugar, brown sugar, eggs, vanilla, flour, salt, baking soda, white chocolate chips, white chocolate bakers chocolate, and macadamia nuts. In a large mixing bowl, combine butter, shortening, both sugars, and vanilla
 Beat on medium speed until smooth and combined. Add eggs, one at a time, beating after each addition
In a separate bowl, combine all of the remaining ingredients, including the chips, bakers chocolate, and macadamia nuts
Stir together until macadamia nuts and chocolate chips are fully coated. Add to the dough
Stir on low speed until just combined, don't over mix or the cookies will become flat
Cover and refrigerate dough about 2 hours. Scoop into dough balls and place on a parchment lined baking sheet
Bake about 8 minutes. Cool on baking sheet a couple minutes
 transfer to foil or wire rack and cool completely

White Chocolate Macadamia Nut Cookies
(adapted from Betty Crocker)

1/2 cup vegetable shortening
1/2 cup butter, softened
1 cup brown sugar
1/2 cup sugar
1 Tbs. vanilla
2 eggs
1 1/2 cups flour
1 tsp. baking soda
1/4 tsp. salt
1 cup white chocolate chips
3 white chocolate baking squares, chopped
1 cup chopped macadamia nuts

Heat oven to 350 degrees. In a large mixing bowl, combine butter, shortening, both sugars, and vanilla. Beat on medium speed until smooth and combined. Add eggs, one at a time, beating after each addition. In a separate bowl, combine all of the remaining ingredients, including the chips, bakers chocolate, and macadamia nuts. Stir together until macadamia nuts and chocolate chips are fully coated. Add to the dough. Stir on low speed until just combined, don't over mix or the cookies will become flat. Cover and refrigerate dough about 2 hours. Scoop into dough balls and place on a parchment lined baking sheet. Bake about 8 minutes. Cool on baking sheet a couple minutes. Transfer to foil or wire rack and cool completely. Store in an air-tight container up to 3 days. 

Thursday, August 4, 2011

Red Velvet Cake Cheesecake for National Cheesecake Day!

Cake and Cheesecake are my two favorite desserts.. and with dessert, I get both. It's like 2 in 1. Perfect. You can do any type of cheesecake or cake combination you like. For example, chocolate cake with peanut butter cheesecake. This is one of my most asked for desserts, it looks impressive, but it's actually pretty simple. Let's start out with the cheesecake layer. Here's what you'll need
A boat load of cream cheese, sugar, vanilla, eggs, and sour cream. Place cream cheese and sugar in a large mixing bowl
Beat on low speed until combined, then turn up to medium and beat until fluffy, about a minute. Add vanilla and sour cream
Mix until combined, then add eggs, one at a time
Beat well after each addition. Pour cheesecake batter into a greased springform pan
Bake and cool. Refrigerate about 2 hours. While the baked cheesecake is chilling, prepare the cake layer. I've already made this exact red velvet cake recipe in cupcakes so I didn't take pictures. Here's the link to the recipe http://kysweettoothsisters.blogspot.com/2011/04/red-velvet-cupcakes.html
The only thing you need to do differently is use 2 round cake pans (what ever size the springform pan is. For example, if you are using a 9-inch springform pan for the cheesecake, you should use 9-inch cake pans for the cake.) Once you have baked your cakes, flip them out of the pans onto wax paper lined cooling racks to cool completely. Now for the last step before assembling, prepare the cream cheese frosting. I've also made cream cheese frosting before so I didn't take step by step pictures of this process either. It shows how to make it in the same link above. Sorry if all of that was super confusing, I did the best I could.. 
So you now have all 3 parts of the dessert made and ready to go. It's time to assemble your red velvet cake cheesecake! Place one layer of the red velvet cake on the serving plate you are going to use. Cover with 1/4 of the cream cheese frosting
Set the cheesecake gently on top of the frosting. Be VERY careful, the cheesecake could split in half, not speaking from personal experience or anything... Now slab on a layer of frosting over the cheesecake. This is a little tricky because the cheesecake is slick
Now stack on the last cake layer and frost all the tops and sides of the cake cheesecake. If desired you can decorate it somehow. I chopped white bakers chocolate and covered the sides and tops in the chopped chocolate. Here's the inside of the Red Velvet Cake Cheesecake
Cut yourself a huge piece, eat the whole thing, and don't regret it :)
Store in refrigerator. 

Red Velvet Cake Cheesecake

Cheesecake:
3 (8 oz. pkgs) cream cheese, softened
1 cup sour cream
2 Tbs. vanilla
3 eggs

In a large mixing bowl, beat together cream cheese and sugar on low speed until combined. Once combined, beat on medium speed until fluffy, about 1 minute. Mix in sour cream and vanilla. Add eggs one at a time, beating well after each addition. Once your cheesecake batter is finished, pour into a greased 9-inch round spring form pan. Bake at 325 degrees for 1 hour 15 minutes. Turn oven off and open door slightly. Remove cheesecake from oven and let cool completely. Prepare the other parts of the cheesecake cake while cooling.

Cake:


2 1/2 cups flour
2 cups sugar
1 Tbs. cocoa powder
1 tsp. salt
1 tsp. baking soda
2 eggs
1 1/2 cups vegetable oil
1 cup buttermilk
1 Tbs. vinegar
2 tsp. vanilla
2 oz. red food coloring

In a large bowl, whisk together flour, sugar, cocoa powder, salt, and baking soda; set aside. In a separate bowl, whisk together eggs, oil, buttermilk, vinegar, vanilla, and food coloring. Pour the wet mixture over the dry mixture. Stir together until combined. Pour into 2 9-inch round greased cake pans. Bake at 350 degrees for 20-28 minutes or until done the cake is set in the middle. Take out of the oven to cool. Flip cakes out of the pans onto a wax paper lined wire wrack. Cool completely. While cooling, prepare the frosting.

Cream Cheese Frosting:
8 ounces cream cheese
1 stick unsalted butter
2 tsp. vanilla
3 3/4 cups powdered sugar

In a mixing bowl, beat together cream cheese and butter until fluffy and smooth. (Usually, when I make frosting I make sure the butter and cream cheese are soft. This time when I made the frosting, I only let the cream cheese and butter sit about about 15-20 minutes. When I started making the frosting they were both still hard, but I just beat them together for a while with the mixer and believe it or not, cream cheese frosting has never turned out better for me.) Mix in the vanilla. Lastly, add the powdered sugar about a cup at a time, beating well after each addition and making sure there are no lumps. Now put together the cake.

Assemble: 
Place one of the red velvet cake layers on the serving plate you choose to use. Scoop 1/4 of the frosting on that layer and spread out evenly. Gently set the cheesecake over the frosting. Carefully spread 1/4 of the frosting on the cheesecake (be careful, the frosting will be hard to spread over the cheesecake because it is slick. If you're having trouble, just be patient, it will spread out eventually. Now set the last cake layer over the frosted cheesecake. Use the rest of the frosting to cover the tops and sides of the cheesecake cake. Decorate if desired. Store in fridge, enjoy :)